User settings
Users admin tool lists all users from all the restaurants that have been registered to this service.
Adding a new user
To add a new user, click the Add user button from the toolbar. The button opens a panel in which you input the email address of the new user. You can only add users that's been added via Azure Active Directory (AAD). You also need to check the Admin checkbox if you want to give them administrator rights. Under the email input is listed all the restaurants separately. Assign one of four different roles to the user for each restaurant you want to grant them an access to. The user won't be able to access any restaurants where they're assigned the No role option. More specific information about each user role and their priviledges can be learned by clicking the Info about roles button located in the top bar.
When you add a new user, an email address has to be added. That email address is final and can't be changed.
An administrator is above all other user roles in terms of rights so you don't have to assign any roles separately to an administrator.
Removing a user
To remove a user, activate a user by clicking the radio button next to it. Then click the now activated Remove user button.
Removing a user is final. A user that's been removed will not be retrievable.
Managing roles
Manage roles button opens a panel that allows you to change the roles of the active user. Check or uncheck the Admin checkbox depending on if you want to grant them administrator access. Administrators have full access to admin page and all the restaurants. You can give a separate role on each individual restaurant for a user as long as they are not an administrator. Don't forget to save changes by clicking the Submit button on the bottom.
Assigning a staff card
Assign staff card button in the command bar opens a panel that allows you to associate a particular user with any of the staff card templates built with the Staff card templates tool.
The staff cards are currently in technical preview state.
Adding a user with Azure Active Directory
The administrators with proper access can also add users to the project via Azure Active Directory service. You can access the service page by clicking the Manage AAD users button at the top right corner. If you have the proper access to the service you should be greeted by a view similar to the image below.
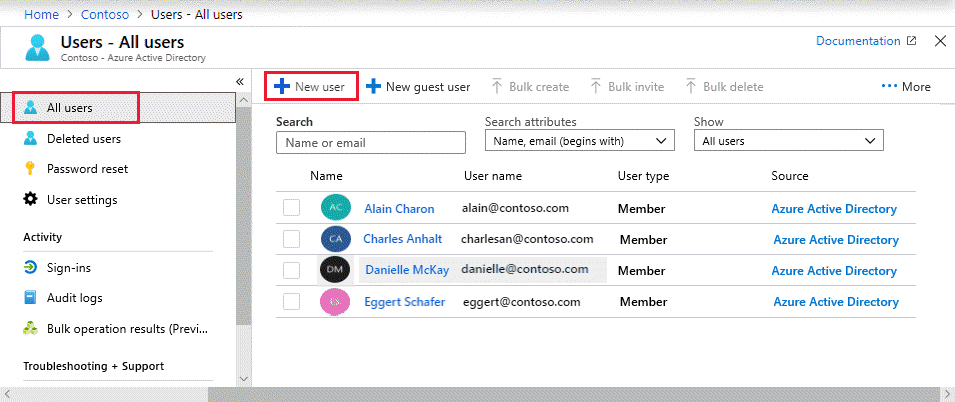
To start adding a new user click the New user button marked in the screenshot above. The page will them ask for information about the user. Out of these only the username and name are required fields to fill. The rest of the fields are optional, though it is recommended that the first and the last name are also given. The form will automatically generate a password for the user. Copy it and send it to the account owner. They will be asked to change the password once they login for the first time. After all is done click the Create button to create the user.
To get more information about adding users in Azure Active Directory visit Microsoft's docs page.